Monday, November 30, 2009

Art Deco Bar Update 4

I trust that all who celebrated are fully recovered from Thanksgiving!  I have just barely done so myself.  And, slowly but surely getting back into the flow of mini-making!

Indeed progress has been made on the Art Deco Bar Room box!  Walls have gone up, along with wall covering.  And some of the details are starting to emerge.

First, take a look at this pic and see if you can tell what it is going to be when it grows up:


Well if you guessed bar tables and hanging lamps, you would be right!  Now be honest, did you really guess correctly?


Here it starts to make more sense.  The chrome plated tube (water supply line in real life) has been cut to size, the wooden discs that make up the base and the tabletop support have been sanded and painted, and the tube has been filled with a wooden dowel.  The screws attach the base and the tabletop support.


One more step and we will have mirrored top bar tables!


Two round mirrors and some double sided carpet tape and Viola'!  There will be 3 of these in the bar positioned under some art deco lamps that I am making from scratch from the other dowels in the pic above.

Shifting gears, when I last updated you I was considering my wall covering.  Well, I settled on white just like in the inspiration picture (see blog update 1).  I realize there is a lot of white in this room but I believe some art pieces, coupled with bar bottles, bar stools, etc. will tone it down a bit.  We'll see.


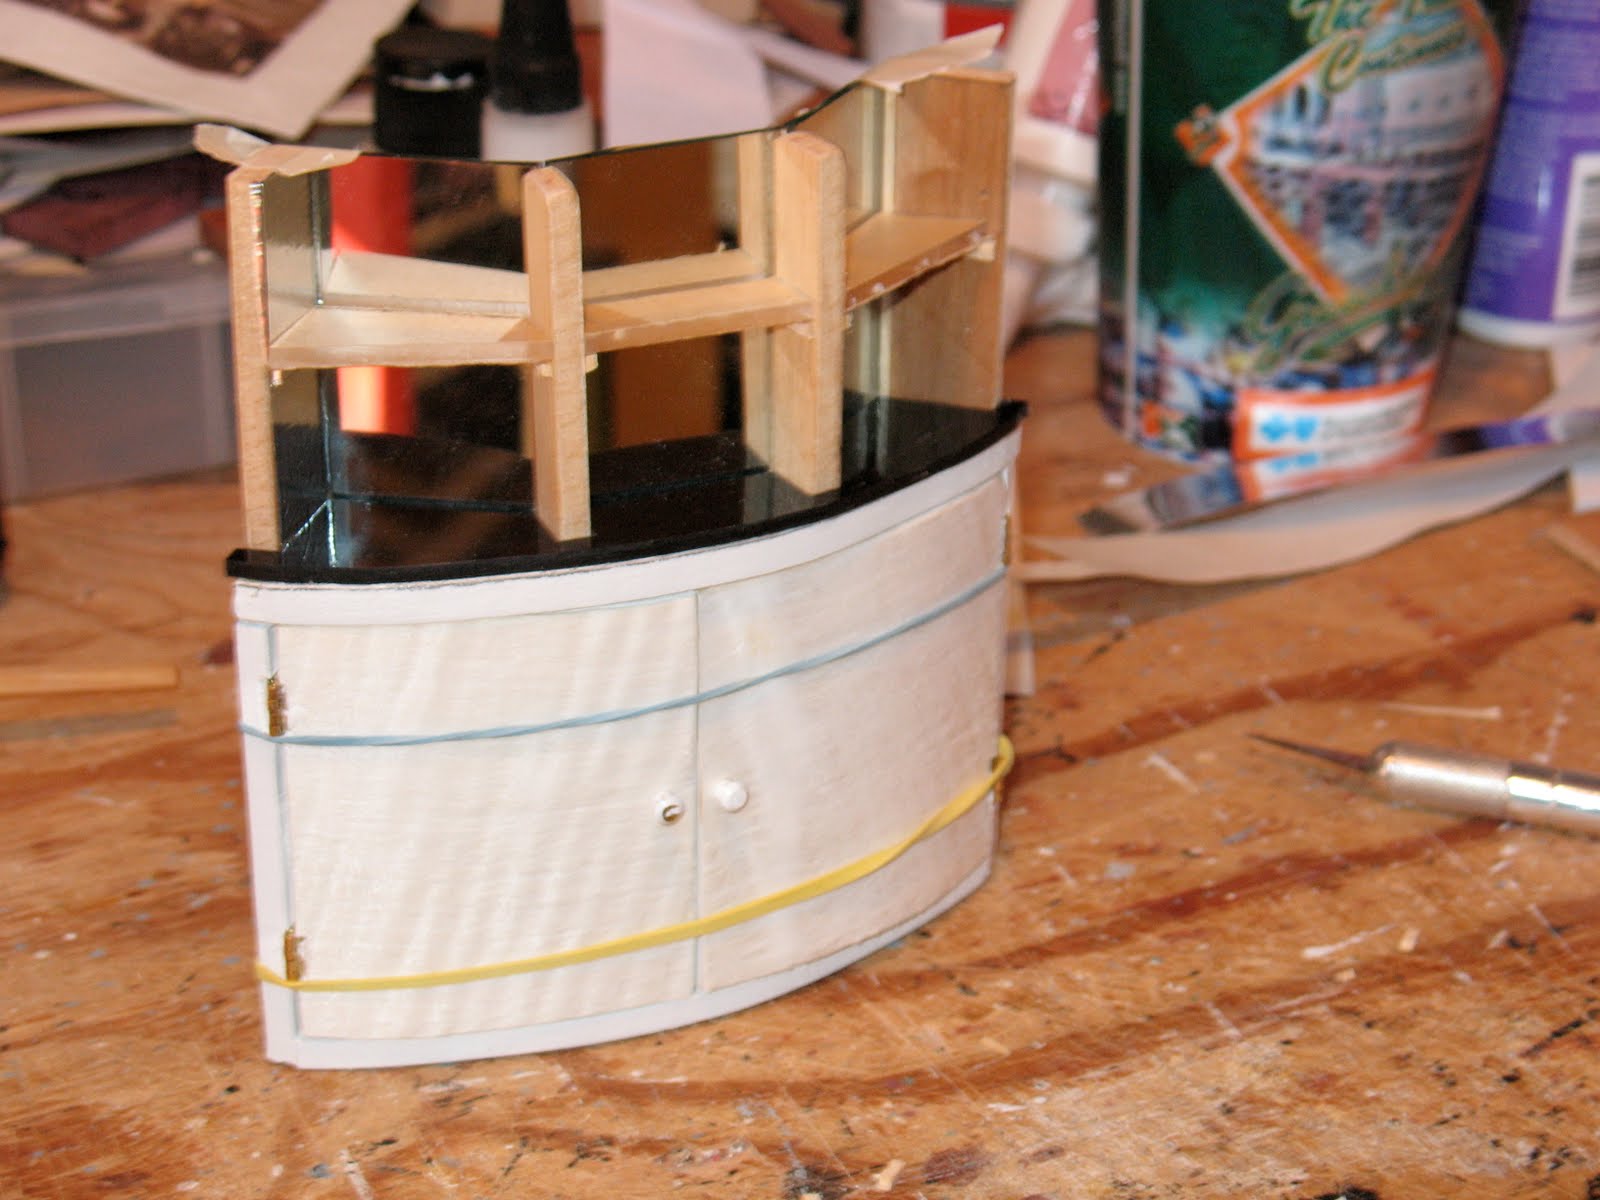
The support in the middle of the pic is temporary as the bar canopy is pretty heavy and is attached to the two walls.  I don't want it to pull free at this point.  When the ceiling goes on, the bar canopy will attach to it as well and add support.


I took this shot to give some perspective of what the patrons at the bar will see.  The space in the middle of the canopy is mirrored and a light fixture sits on point.  This fixture along with three down lit lights in the back corner bar will provide plenty of light for the bartenders.


Well, the wall covering is in place and the 3 bar tables are completed and temporarily stationed in their place.  The hanging lights over the tables are working lamps that I made from dowels that are hollowed out to accept the receptacle.  These were inspired by the hanging lamp over the main bar in the inspiration pic.  Also, note that I am experimenting with some mirrors on the left wall.  More on that next.


As you can see, I removed the ceiling to allow for some clamping of the columns that will stand proud of each side of the mirrors.  The outermost column serves the additional purpose of supporting the plexiglas wall when it is added.  Notice the slot routed into the left column in this shot.  More on that next time.

As you can see we are closing in on adding carpet, barstools, and drinks!  Soon the MBD Bar will be open!

Thanks for peeking in!

Thursday, November 19, 2009

Art Deco Bar Update 3

Hard to believe it has just been a week since my last update.  Seems like a month!  Oh well, here we go.


You might recall I overdid the size of the back corner bar and had to "shrink" it down a bit.  Here I have cut the black Plexiglas top and notched it out for the shelf supports.  Also I have dry fit the mirrors in place.


No don't worry, I haven't switched to working on the deck of the Starship Enterprise!  LOL!  This is the "inside" area of the roof section over the bar.  In order to generate enough light from the LED's that will live inside this section, I used foil tape to generate reflection rather than wood absorption.  You can just make out the blue and red and clear plexiglas between each stepped out layer of the ceiling.  The LED's will illuminate these on the outside rim for a nice affect.  I hope.......


Here you can get a sense of the ceiling profile as it will look over the bar.  Nice use of the Xacto knife don't you think?


Here the black plexi has the protective paper removed and the clear plexi shelves are dry fit in place.  I chose to cover the shelf supports with aluminum tape rather than paint them.  This will add a reflective quality to the mirrors when the LED lights shine down from above the shelves.


Here the completed back corner bar has been dry fit in place.  The ceiling over the bar has been attached to the 2 side walls and you can see the actual bar in the far right of the picture.  I confess I am not happy with the arches in the back bar as they gave me considerable fits.  However, rather than smash this section to bits and start over, I have decided to live with this slight imperfection as the real star of this show is the bar and the ceiling over the bar.


Here the laminate is going on the bar front.  Once it is all in place, I will install the bar top and work on the footrest that will go around the base of the bar on this front side.  My next focus will be the completed ceiling and lighting, the floor behind the bar and determine how I want to treat the walls.  Hmmmmmmm

Thanks for peeking in!  Tell next time!


Thursday, November 12, 2009

Art Deco Bar Update 2

Progress has been slowed by the remnants of Ida drenching North Carolina and bringing along with it a cold snap (upper 40's).  However, I am too excited about this project to be kept away and have persevered. So here is update number 2.


I have approached this project as 3 main projects within the big picture.  The bar, the back corner bar, and the stepped out ceiling area over the bar.  This picture shows the dry fit of the 4 parts that make up the ceiling over the bar.  This is looking from the top down, the cutout area in the base piece will be covered by a mirror or smoked plexi.


Using the inspiration pic in my first post on this project as my reference point, I am "dressing" the outer edge of the curved bar ceiling pieces with laminate dyed white.  Here the first piece goes on!  I subsequently completed all three curved pieces and set them aside to dry over night.


Shifting from the ceiling project, here I am dry fitting the arched curves that frame the mirrored back shelves on the back corner bar.  Unfortunately, this opened my realization that I had a problem in the making.

Here the back corner bar top and doors are dry fit to the assembled base cabinet.  In the background you can see the arches for the top of the cabinet have been painted white.  Next I placed this dry fit piece and the bar on the floor piece to check size and fit.


Yep, too darn big!  It kills me to redo things but I had no choice in this case.  The domino affect would have been to cut a larger floor and cut a new ceiling over the bar, etc., etc.  Any of you in the mini world has been down this road before and I feel sure you hate it as much as I do.  Anyway, here the assembled base cabinet has be cut apart, resized, and is being glued back together.


Ta Da!  Magic, just two days later and 40% smaller.  Now I can move forward again.


The centerpiece of this roombox is of course, the bar!  Here you can get some detail of the construction I used.  In this photo I have started the actual bar counter.  Originally I made the counter a single piece but with all the upright supports and curves, I could not get it into place without removing the bar top which was already glued and secured in place.  I opted to cut the counter into 7 or 8 individual pieces.  Here the first 3 are cut, covered with aluminum and dry fit in place.  Only 5 more to go!


Here all the bar counter pieces are cut, covered in aluminum and dry fit to the bar.  I will wait to glue the pieces in place until after the laminate under the counter is in place.


And Viola', the laminate goes on!  This laminate is dyed black.  I left an open space on the left side and one on the right side that will contain some open shelves.  So I have measured and cut three pieces to fill in under the bar counter.  These were clamped and left over night to dry.

In my next update I think you will be able to clearly see how these three main projects start to come together.  Thanks for peeking in!

Friday, November 6, 2009

The Art Deco Bar

This project is the second in what I hope will be a series of three room boxes.  The first is called the Anteroom for the MBD Club.  MBD stands for Minibydesign, I know very original!  The inspiration for the anteroom was a picture I saw in an art deco book and the doorway of the room really caught my eye.  I immediately started the process to recreate the door in dollhouse scale.  This led me to create a room box for the door which in turn inspired me to make a couple of art deco style club chairs for the room.  I am waiting for some decorator items to by added from one of talented team mates in Team MIDS as part of the ETSY site.  So, I will suspend discussion on "Phase 1" until I get the items from my team mate.  Then I will provide and update and some pictures.

Unfortunately, in my haste to start the door project for the anteroom, I didn't think to take pictures of the making process.  So, I have corrected myself for "Phase 2", the Art Deco bar of the MBD Club!

First, let me share a picture of the inspiration room:


The stylized nature of this bar allows me to set it coming out from the far corner of the room box.  This will leave me room to scatter a few tables about the room as well.  I love the curves, the mirrored back wall and the stepped out ceiling over the bar.


This picture shows the matt board drawing and cut-outs I will use to shape the wood pieces for the bar.  Notice the ceiling over the bar laps out over the inside and outside of the bar.  Also, note the curved counter of the back bar.


Here I have dry fitted the mirrors on the top of the back bar counter.  I want to be sure there is enough room between the mirrors and counter edge to allow for shelves and curved cove covers over the mirrors.


Besides being able to see how cluttered my workbench is, here you can see the rear bar counter base taking shape.  Since the face of the rear bar counter is curved I am making curved doors for the openings.  You can see the curved forms glued and clamped to the tops and bottoms of both doors.  After the middle portion dries solid for 24 hours, I will bring up the far edges and clamp them for 24 to 48 hours to insure that they hold their curved shape.  The wood for the door is basswood as it is flexible enough to be shaped.  I will probably cover the exterior with a laminate before installing them.  I have some lovely white laminate in stock that just might do the trick.


In this photo, if you can ignore the clutter in the background, you can see the actual bar start to take shape.  I have cut the curved pieces for the top and bottom and added the first 4 of 7 total upright supports.  This will sit overnight and then the other 3 uprights will be added tomorrow.

So, in 2 days we have the basic design, good progress on the back bar counter, and a good start on the actual bar!  Whew!

Oh and as a bonus, a fellow team mate on Team MIDS in the ETSY forum has agreed to tackle the seats for my bar stools!  Check her out at www.dalesdreams.etsy.com!  She does fab work!

Hopefully more to update after this weekend!

Thanks for peeking in.

Monday, November 2, 2009

Flickr

This is a test post from flickr, a fancy photo sharing thing.

Flickr

This is a test post from flickr, a fancy photo sharing thing.